Wednesday, 3 October 2012

Illustration_Ex6

This is the original picture which i took my face only for this exercise. Ignore the reason why we dress this way and posing its for pass event.
I skip the previous exercise which is use the path finder and work with the pear and vormator. Currently still working with it, will upload as soon as possible.

Tuesday, 25 September 2012

Digital Imaging_week 5

Stamp Clone Exercise
Before
After
Army of Squirrel!! =D
_________________________________________________________________________________
Before
 After
 _________________________________________________________________________________
Perspective (Two Vanishing Point)
Before
After

Thursday, 13 September 2012

Sunday, 9 September 2012

Digital Imaging - Mask with Pen Tool

First download the picture from the 'Dropbox' then open it with photoshop. Select "Pen Tool" (P) to trace the part that I want.
 After done tracing click "Path" and click "Load path selection" which is round doted line bottom of the "Path" menu.
 Then click "Channel" which is beside "layer" or "Path", remove the Red & Green and click the "layer mask" then the picture will turn as the picture shown above. From here I can remove or add the certain part I want using brush tool (Black to remove, white to add).
 Then find for the picture desire for the background and put under the girl layer. Synchronize the girl picture and background using "Match Color".
From the "Match Color" menu I adjust the Luminance, color intensity and fade to match the background.

 Lastly, I used the burn tool and dodge tool to darken or lighten the picture I traced.


Voila! Done :D
for this picture I used "selective color" to adjust the the color more orange.

Wednesday, 5 September 2012

Illustration Exercise 2

 This exercise require me to pick a photo and use only line to follow the flow of the picture and separate them into foreground, mid-ground and background. I pick this photo is because I found out the electric box rusty part has a interesting flow. I wasn't sure I did it right cause other of my classmate the use paddy field and trees picture to do it. The mid-ground and background kinda rough due to the late hour I been trying to finish this in time.

This is the original photo that I used, taken at Ipoh.

Saturday, 1 September 2012

Exercise_1(A)

Exercise for shading techniques hatching, cross hatching and stippling.

Illustration (Ex_1)

Tracing a photo on my self using hatching and cross hatching technique.

Friday, 24 August 2012

Digital Image Exercise 1


Our first exercise for digital imaging class which require us to take a photo of our self using green screen as the background and select only the needed part using masking. This exercise also teaches us avoid erasing or delete away the part which we do not want it appear in the picture.
This is the original picture that I snap with my camera using the green screen.

Step 1
Select the picture and open with Photoshop,then unlock the layer to edit the picture.

Step 2
Press "Select" on the above selection and click "Color Range".
Step 3
After click the "Color Range" is will pop out a menu. In the menu select the color to 'Green' because that is the color which I want to select and below down there is another selection preview change it to 'Quick Mask'. Make sure it's invert. After everything has done setup click the background where I want to be the selection and adjust till I feel it's fine, then press OK.
Step 4
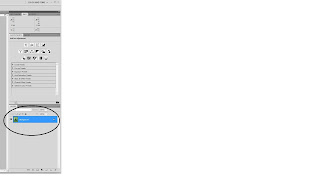
After done with the selection color, click the button "add layer mask" at the bottom right where is under the layer selection.
Step 5
Right after clicked the button the color green will be remove from the picture including the part I want. So select the brush tool and use only 2 color (black & white). By adding black it will remove the part that I don't want and white is the opposite. It's not really erasing anything from the picture, it's just covered from another layer.

Step 6
When everything is done it will look like this. Search for another background picture desire and just add in then just do some editing using burn and dodge tool to make it more real.